cross-posted from: https://slrpnk.net/post/9263490
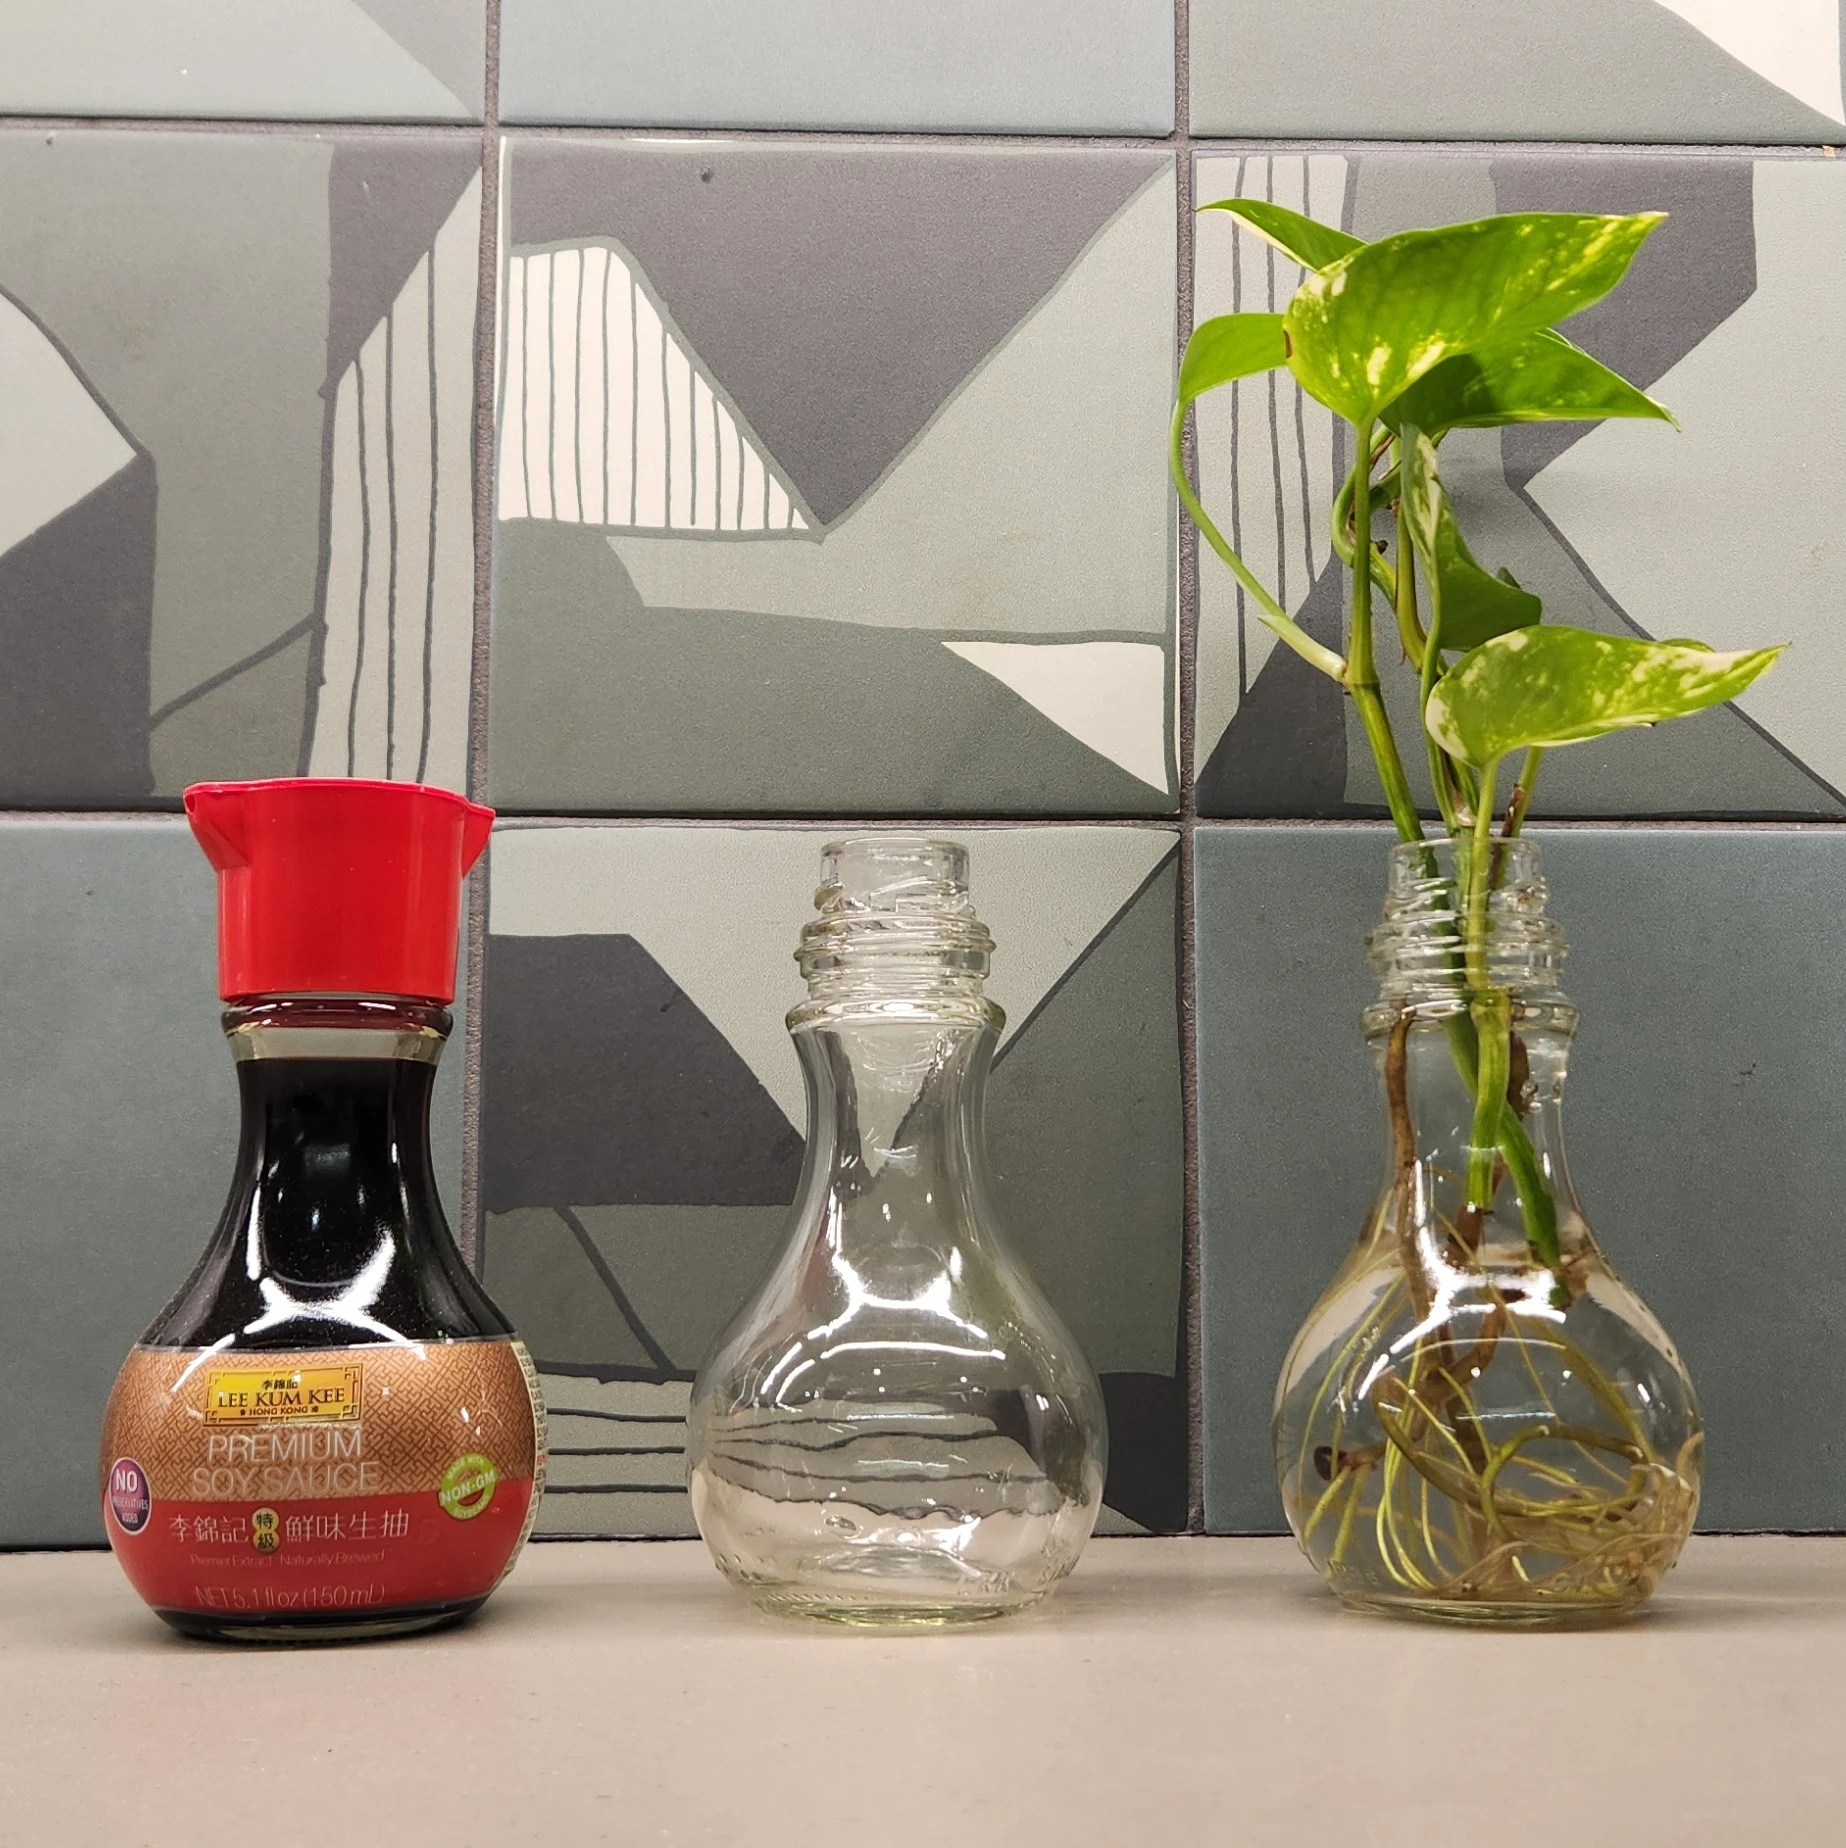
> Pictured: three glass bottles in a row. On the left, it's a full bottle of soy sauce. In the middle, it's an empty bottle with the label removed. On the right, it's another empty bottle with a rooted pothos cutting in it.
>
> My workplace provides snacks and some condiments for folks. When the soy sauce runs out, I do my best to snag the bottle. It looks like it ought to have a potion in it. A plant is the next best thing!

I stumbled onto this article while working on a photobash of a solarpunk scene. I think it does a good job of explaining the concept but there seems to be something wrong with its certificates, which might throw an error in your web browser. https://nwedible.com/urbanite-broken-concrete-retaining-wall-as-a-garden-feature/
Just in case you don't want to check the link I'm also going to plagiarize a few quotes and images from the article:

"The marketing term for “old chunks of broken up concrete” is urbanite. Urbanite has a lot going for it: it’s durable and heavy like natural stone, reusing this product in garden and landscape design takes it out of the waste stream, it’s often a uniform thickness which makes it easy to stack or lay as a permeable patio surface, it’s often available in most urban locations, and it’s frequently free for the hauling. Free is good.
Drawbacks to urbanite can include potential contamination – this is more of an concern if your urbanite comes from a torn out commercial parking lot where all manner of auto fluids may have seeped into it than from the neighbor’s pool deck tear-out. Concrete itself can contain additives that might pose a health or contamination risk, although my feeling is that old, weathered concrete has probably already leached the worst of itself out somewhere else.
I probably wouldn’t use urbanite to build edible garden beds, but I can see great potential for turning this waste product in retaining walls, steps, and patio areas."


And a few examples of recycled concrete patios:


This last one came from https://www.terranovalandscaping.com/90/, which has a few other examples, including raised beds, so perhaps they knew their source of concrete was clean, or weren't worried about the potential for contanimation?

 English
- •
- slrpnk.net
- •
- 3M
- •

> ([Image Source](https://superbee.me/refresh-wool-dryer-balls/))
100% wool dryer balls are growing in popularity to the point where I have even seen them at my local dollar store, and for good reason. They can save you money in laundry costs.
If you are someone who uses dryer sheets, these wool balls are a great alternative that removes static from your clothes and [can decrease drying time by around 30-50%](https://davidsuzuki.org/living-green/wool-dryer-balls-shrink-drying-time/). So, you save money by not having to buy dryer sheets, as well as on electricity. All you do is toss them into the dryer with your clothes!
> "Per Toner, “Dryer balls excel in reducing drying time due to their ability to create space between clothes. This separation facilitates better air circulation, leading to faster drying and potential energy savings.” | [bobvila](https://www.bobvila.com/articles/what-do-dryer-balls-do/)
I have had mine for many many years now, and they are still in great shape. When or if they do ever break down to the point of being unable to use, the wool is biodegradable.
Just make sure that what you buy is 100% wool. If you are crafty (and have access to wool) you can also make your own fairly easily.
https://youtu.be/de644Zwtnbg


Plastic Free July is upon us! Rebecca Prince-Ruiz, founder of Plastic Free July, encourages people to take the challenge with friends, start small and keep a “plastic-free kit” on hand.
- @solo@slrpnk.net English
- •
- www.washingtonpost.com
- •
- 3M
- •
[Archive link](https://archive.ph/fLQki)
After eating the last pickle save the jar of pickle juice. Then when a broccoli stem becomes available cut the tough outer skin off, chop it up and toss it in the pickle juice. Works well. They reach a taste that’s very close what the pickles tasted like. After 2 or 3 cycles of that the pickle juice starts losing its strong punch. Adding vinegar and a sweetener can help at that point if you don’t have more pickle juice by then.
Otherwise broccoli stems are not too versatile. They’re not that great in veg. stock because they bring a bit of bitterness. So I only use like ½ a stem in a pot of broth (which is wholly from veg scraps).
My next experiment (untested): reusing juice from a jar of jalapẽnos to pickle broccoli stems.

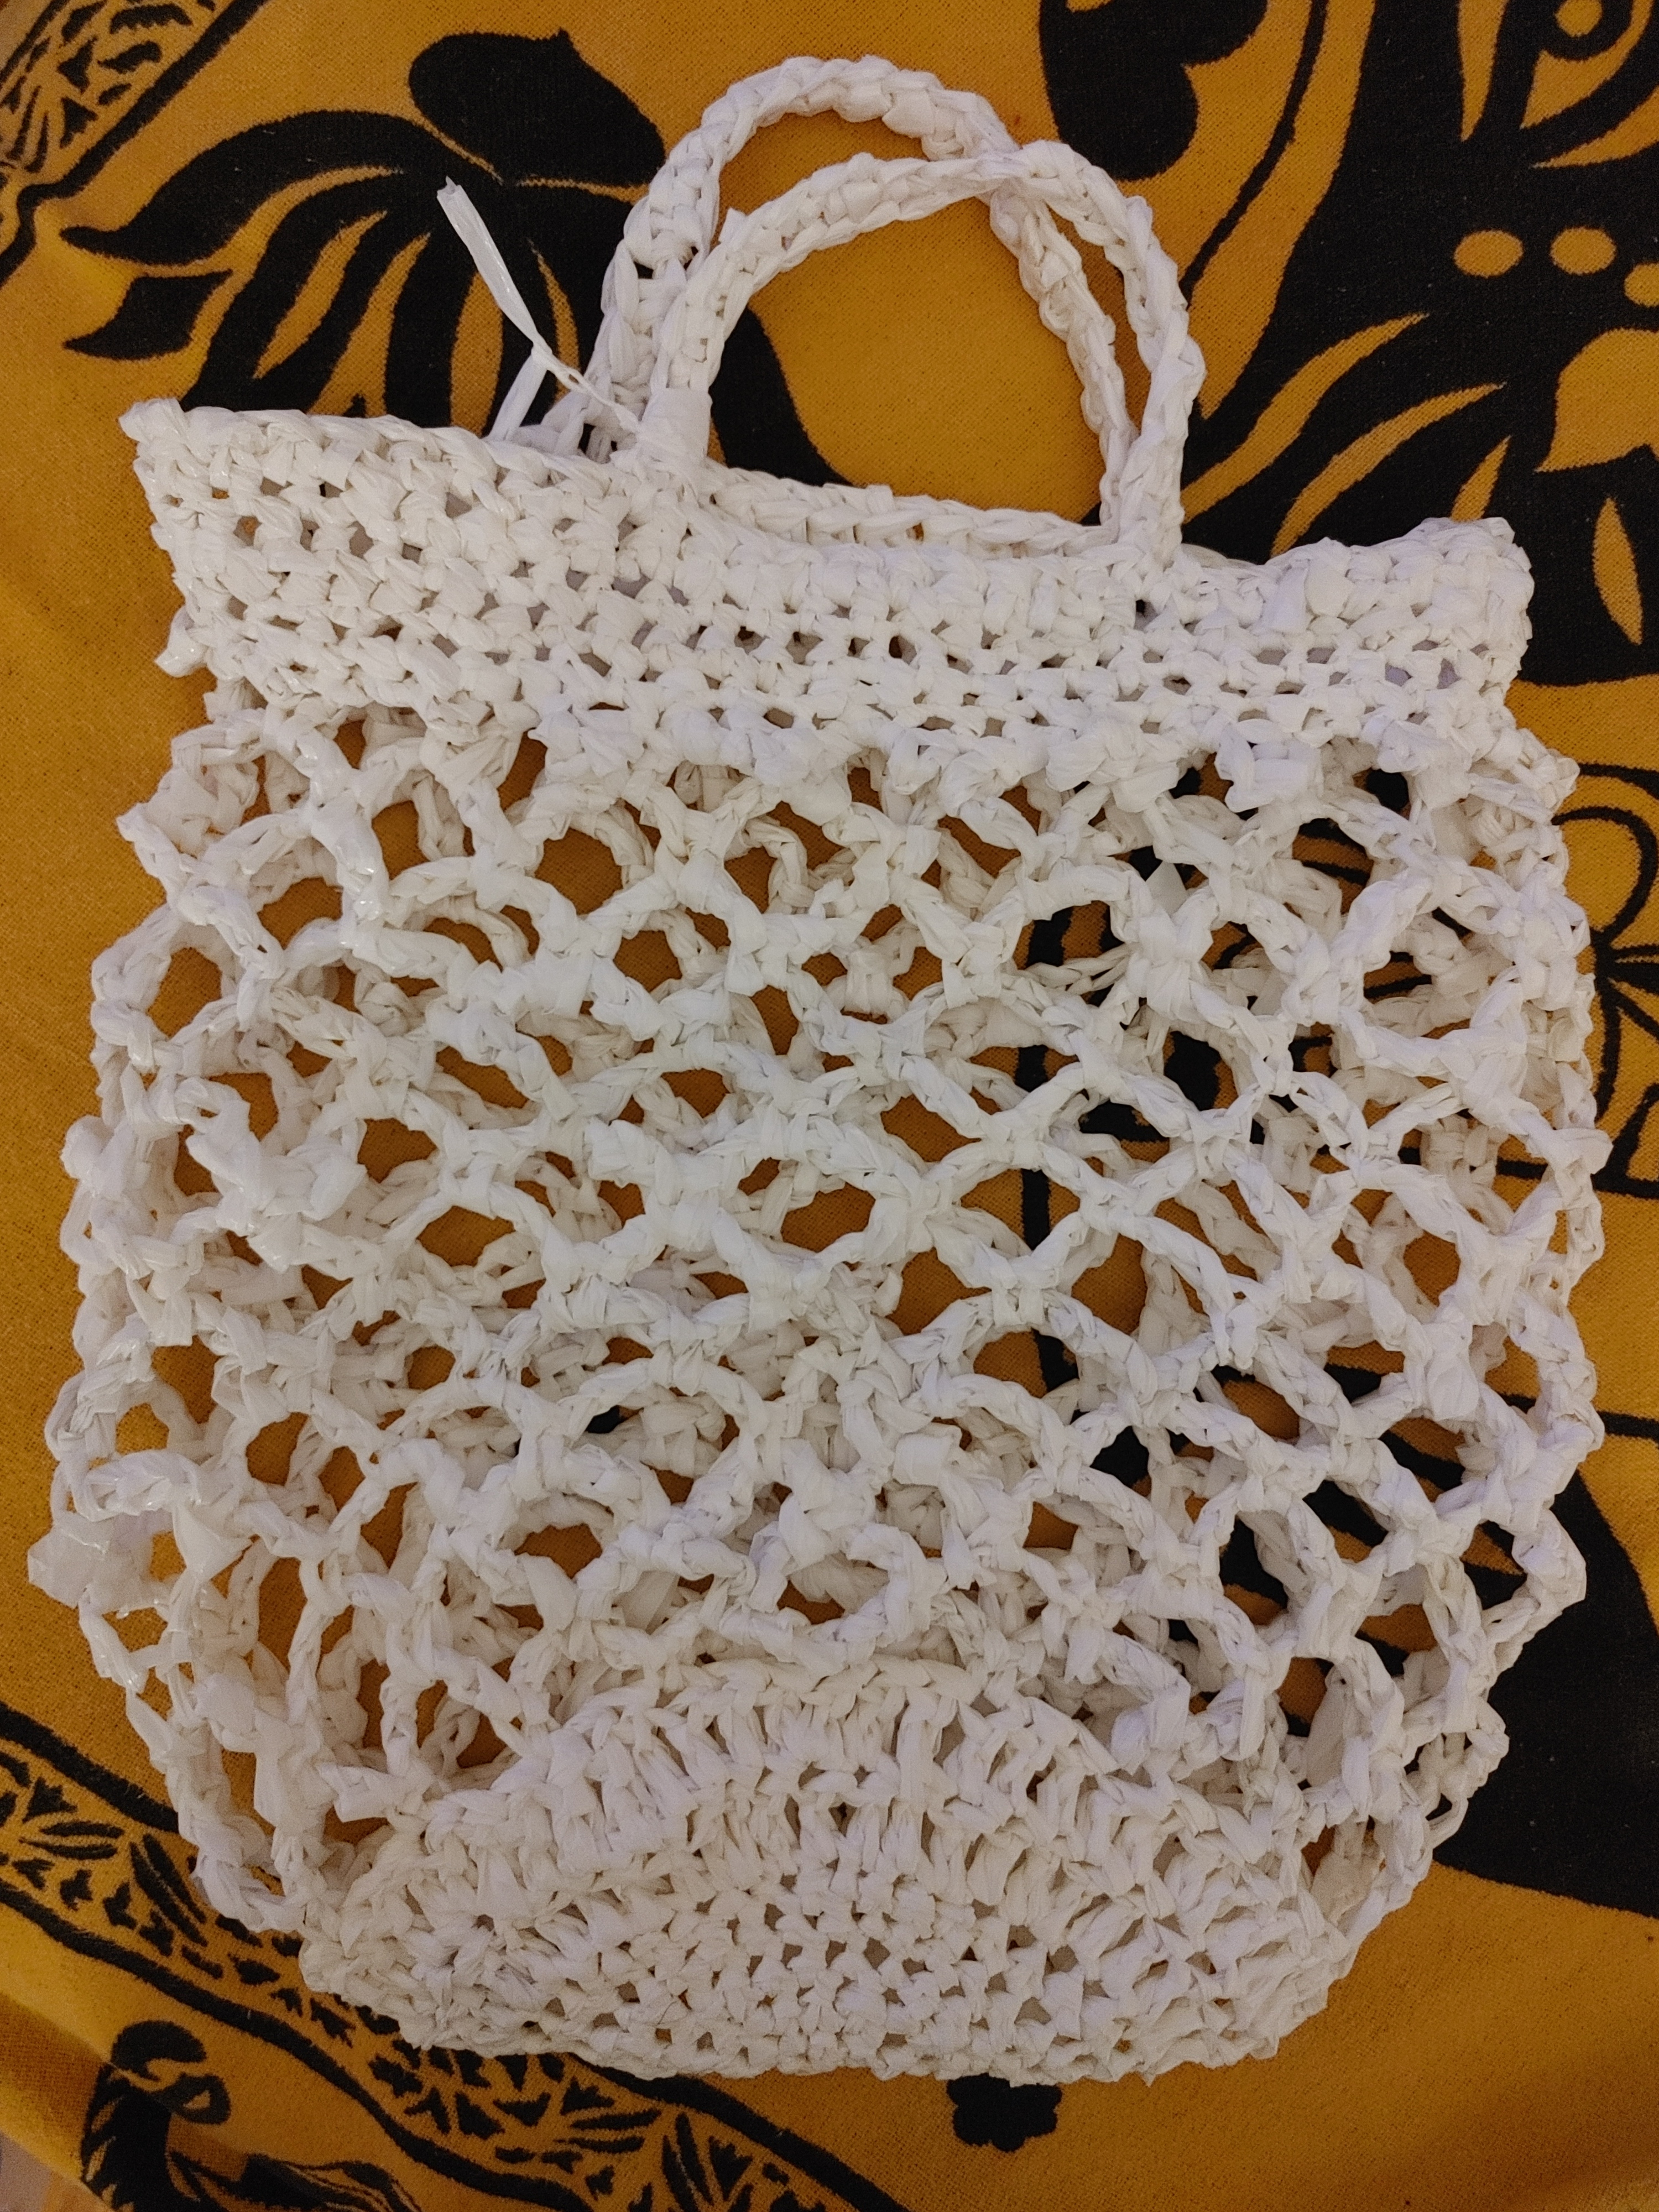
I saw a video about ten years ago on crocheting with plarn (plastic bag yarn) and I thought it was such a neat idea. There was just one problem: I didn't know how to crochet. So, I started hoarding all my plastic bags (even more than I already was) thinking, "Oh, I'll learn how to crochet one day!" I finally learned to crochet a few weeks ago and now I'm working my way through my massive bag stash. I left the tail ends on and tried to tie them into decorations so I wouldn't waste any of the plastic.
I am way too excited about my trash bag bag. :)
It doesn’t take long for mold to grow on empty beer bottles. Considering beer bottles get returned for a refund, you have to assume that the brewery will make an effort to reuse as many as possible.
I toured a brewery once and they showed us the big industrial bottle washing machine. They said the bottles get scanned for cracks using a laser, and rejects obviously get tossed. The question is: what about mold, which adheres quite well to the corners of the glass? I wonder if the laser also detects bottles that didn’t get clean. Or if they just figure the temps would kill everything and just be considered safe enough from there.
- @vudu@slrpnk.net English
- •
- www.core77.com
- •
- 5M
- •
cross-posted from: https://lemmy.world/post/16216407
> I'm sharing this because any reduction in unnecessary packaging waste is good for the planet - and because I think laser-etching avocados is funny. 🙂
 English
- •
- www.opb.org
- •
- 8M
- •
>The tribe will also install a small biodigester, which will use bacteria to break down organic material in the absence of air — referred to as an anaerobic environment — and turn it to methane for cooking and fertilizer for the tribe’s community garden.
My SO's company handles food. Sometimes that food goes bad. In this case, they got a whole shipment of milk days away from its expiration date (at which point they can't serve it, and local food pantries very sensibly won't accept it). Luckily, they're not committed to dumping it down the drain, and they'll let us take it.
Sometimes it's still okay to drink, but usually we take it so we can make farmer's cheese. This is a soft, mild cheese which makes an awesome dip/spread, or which is useful as an ingredient in other foods. It's super easy, and requires no aging, just heat and vinegar. This was our biggest batch yet.
We normally use this recipe: https://www.olgainthekitchen.com/homemade-farmers-cheese/ though we add additional seasonings depending on how we plan to use the cheese.
Step one is to bring the milk up to temp. The recipe will have more details, but the important thing is to stir it to keep the milk from burning and not to bring it all the way to a boil. We wait until there's a sort of bubble froth along the edge of the pot.
Once it's hot, its time to mix in the vinegar. You want 1/2 cup of vinegar per gallon of milk. Stir it and you'll immediately see the milk separate into clumpy white curds, and the thin yellow whey. If it doesn't separate, hey just add more vinegar.
Strain it through a siev or cheesecloth. You can speed things up by squeezing it a bit, but be careful since it'll be hot.
Let it drain a bit and you've got farmer's cheese. You have tons of options from here. You can keep draining it in the fridge if you want it kinda crumbly, or you can run it through the food processor with a bunch of seasonings to make a nice smooth, spreadable dip. We have a cheap jalapeno cilantro mix we really like for making a dip for crackers. You can also use it as a filling for stuffed shells, or mix it into a white sauce for pasta.
Alternatively, leave it unseasoned and use it to make syrniki, a kind of traditional Russian cheese pancake which is really good. (I've posted about this previously here: https://imgur.com/a/vqk4r4B and the recipe is here: https://www.alyonascooking.com/syrniki-recipe-cheese-pancakes/ )
Like I said, this is our biggest batch yet. Five and a half gallons of milk condensed down to one large bag of cheese. Our plan is to portion off enough for any meals that'll use it this week, and then to freeze the rest.
- •
- www.goodnewsnetwork.org
- •
- 3M
- •
> Around 50 billion disposable drink cups are used every year in the US, but in the city of Petaluma, we will see if Americans have the discipline to reduce this footprint.
>The city numbers around 60,000 people, and will participate in the Reuseable Cup Project. The aim is to furnish 30 local restaurants, from Starbucks to Taco Bell, with identical, durable, plastic drink cups, which customers and diners can use and then either leave on the table, or deposit in a network of dropoff bins around the city.
Article in French. Feel free to use a transaltor.
A french speaking zero waste community has opened : [!zero_dechet@jlai.lu](https://jlai.lu/c/zero_dechet)
This is my first step-by-step post using our local movim microblog rather than imgur. I'll upload it to [imgur](https://imgur.com/gallery/FQO6MJU) later as a backup but I'm seriously impressed with movim, very glad to have a noncorporate place for my projects. Let me know if there's any issue with [the link.](https://movim.slrpnk.net/blog/jacobcoffinwrites%40slrpnk.net/picture-frame-made-from-salvaged-wood-ftNKhh)
This is another quick one but at least I remembered to take pictures for most of it. I don’t enjoy oil painting as much as I do [photobashes](https://jacobcoffinwrites.wordpress.com/postcards-from-a-solarpunk-future/) and other digital art, but it’s still a lot of fun in the right moment. I needed a picture frame for a recent one, to complete a gift to a relative. It was on a stretched canvas, rather than canvasboard, so the frame had to be deeper than normal. So decided to just make it from scrap lumber I had squirreled away.
I started with this stuff. These 1 ½” by 1 ¾” boards were part of a kind of disappointing haul I got from my local Everything is Free page. I don’t remember what it was I thought I’d find there, but by the time I got to it, all that was left was this tangle of busted-up boards from inside some kind of homemade builtin cabinet. They were cracked from their demolition, and full of wood screws, but I took them because there was still plenty of good material and I think I wanted to justify the trip.
I pulled all the screws and used them in another project, and when I went looking for material for the picture frame, they were pretty much perfect. Plenty of material, and I didn’t have to worry I’d use it for something better. The painting was of a rustic cabin, so the frame was going to be a bit rustic anyways, so a little battle damage was no big deal.
I measured and marked them based on a picture frame my grandfather had made (I would have used it instead but it wasn’t deep enough for the stretched canvas). I cut them to length, then down to 45 degrees on my miter saw (it makes squaring up lumber and doing corners absurdly easy, I used to do them all by hand and getting them to fit was much more art than science back then.)
Once I was looking at it, I realized the frame was a bit too thick, and decided to remove about half an inch in depth from the four pieces. This would be quick work on a table saw, but I don’t have one, so I marked a line and used the band saw. Then I sanded up all the sides on a belt sander until they looked good. There was a bit of stain left in deep spots from the original project, and I tried to keep some of it – I like a little character and history from the life of the piece. This wood was a part of someone’s home, they knocked it out with a sledge hammer, a weird goblin man came by on trash day and took it, now it’s a picture frame hanging on a wall.
Then I had to use the router to notch the back of all the pieces to hold the actual canvas. My router was a recent junk store find, it’s the old craftsman kind that’s a hand router bolted to the underside of a little fiberglass table. I screwed it to the workbench over the lathe, down on the far end, since its out of the way and that’s my heaviest workbench. I have plans to rewire the router, so you can turn it on and off with a proper tool switch, like I did for the drill press, but I haven’t done that yet, so turning it on meant reaching underneath, feeling for one of the handles, finding the trigger and the locking button, and setting them, at which point it begins to spin. It’s awkward and I wouldn’t want to have to do that in an emergency.
This was my first time really using a router on my own projects, so it wasn’t quite as pretty as I’d like, but overall it looks fine. I definitely want to replace the small, two-part fence with a taller one that runs end-to-end and gets closer to the blade. That would reduce the piece’s ability to wobble when its only braced against one of them.
Once the notch was cut I found the 45 clamp didn’t work that well so I stuck each joint together with a big dab of wood glue and a couple small dabs of super glue. The super glue gives you just enough time to get the pieces where you want them, and sort of acts as the clamping force for the wood glue, which takes much longer to dry.
Once it was dry, I stained the frame with Sedonia Red, it came out a sort of pink color but I think it’ll be a good fit for the white cabin with red trim in the painting, and the recipient can always hit it with a second coat of a darker stain if they choose.
The last step was to add a cable to the back. They make little metal picture frame hanger things, and I thought about just cutting and bending one from a soda can, but to be honest, I kinda hate those hangers. I don’t think they work well and they feel unreliable to me. Usually I just use a strand pulled from some damaged CAT 5 wire, but this time I happened to have this metal cable left over from… somewhere? I honestly can’t remember what it came from. But it’s the sort of thing I keep because it doesn’t take up much space and it’ll be useful eventually, and sure enough it was! The loops had already been cut, so I just drilled a hole through the little aluminum clamps at either end, used the vice to squeeze them down on the wire a little extra, and used them to attach the cable to the painting. I measured both holes from the top, and predrilled them with a thin bit to make driving in the nail easier (since I didn’t want to break the picture frame.
As a very last touch, I cut a tiny sliver of wood and glued it into a notch where the miter saw ripped out a bit of wood at the top left corner. A little stain blended that back in nicely.
Overall, not bad for my first picture frame. It’s a little rough, but it’s supposed to look that way.
- @activistPnk@slrpnk.net English
- •
- 22d
- •
I’ve been stock-piling electronics that either people throw away, or things I bought 2nd-hand only to find they are broken.
Looks like the right to repair law is in very slow motion. Not yet enacted be the European Commission. And once it is, member states have like 2 years to actually enact it in their law. Probably even more time before consumers begin to see results.
(edit) I think some US states were the first to enact right to repair laws. So some consumers could perhaps pretend to be from one of those states to demand things like service manuals. But parts and repair is likely more out of reach ATM.

 English
- •
- cdn.statcdn.com
- •
- 1M
- •

publication croisée depuis : https://feddit.org/post/3142575
> [Source.](https://www.statista.com/chart/24350/total-annual-household-waste-produced-in-selected-countries/?utm_souce=Blog&utm_medium=RSS)
- @activistPnk@slrpnk.net English
- •
- 1M
- •
In the past few years I have salvaged 4 LCD screens from curbs. All of them function without defect. I have no idea why people are tossing them out. One of the 4 was perhaps tossed due to size (it was about the size of a laptop screen). But the other 3 are a decent size. Most of them even have DVI connectors. I think one of the three only has a VGA connector, so perhaps the owner did not know that could be adapted.
If you notice a dumped LCD, grab it. Don’t assume it’s broken.
I also often see flat screen TVs being dumped. They are too big to easily carry on my bicycle so I’ve not made the effort to collect them and test them. Has anyone? I just wonder if I should make the effort. Why are people tossing them? Is it because ”smart” (read: cloud dependent) TVs are becoming obsolete and owners are not smart enough to use the HDMI inputs? Or is it more commonly a case of broken hardware?
(update)
Saw ~4 or so big flat TVs in the “proper” city e-waste collection. The city provides a pallet with walls (a big box) where people dump their electronics. Then the city goes through it and gives anything that works to 2nd-hand shops. They also try to repair some things. In principle, it’s a good idea to have a process like this. But I’m somewhat gutted by this:
* no one labels the waste as working or not
* the designated middleman who sorts through it does not bother testing most things.. e.g. printers are categorically destroyed.
* the public gets no access to the waste in the step between salvage and dump (I need a spare part for a particular device and have no hope of getting it)
* the stuff is just dumped unprotected in this big box. So other appliances get tossed on top LCDs and edges of those things damage screens in transport
It’s illegal to dump e-waste on the street or in landfills in my area. They must follow the above process because persnickety neighborhood cleanliness people have pressured the gov to enforced the ban on curbside dumping. But curbside dumping is actually more environmentally sound because locals have a chance to grab something in a less damage-prone way.
- @activistPnk@slrpnk.net English
- •
- 1M
- •
The avg. age of a car bought in Africa at the time of purchase is 21 years old. All these people buying EVs think they are taking a gas-burner off the road. But in fact cars do not get thrown away. They get shipped to Africa where they live on and continue to emit GHG for decades longer.
So what’s the answer? Destroying the car is a non-starter, as no one would throw away value. It would be like asking people to set some of their cash on fire.
Why not remove the engine and repurpose it as a backup power generator for power outtages? Then convert the rest of the car into an EV.
Conversions are being done. There are some companies offering to do the work. But these are very small scale operations that are rarely spoken of. I have to wonder why (what seems like) the best solution is being overlooked.
zerowaste
!zerowaste@slrpnk.netYou are not logged in. However you can subscribe from another Fediverse account, for example Lemmy or Mastodon. To do this, paste the following into the search field of your instance: !zerowaste@slrpnk.net
Discussing ways to reduce waste and build community!
Celebrate thrift as a virtue, talk about creative ways to make do, or show off how you reused something!
- 0 users online
- 0 users / day
- 0 users / week
- 0 users / month
- 0 users / 6 months
- 1 subscriber
- 20 Posts
- 150 Comments
- Modlog
SLRPNK
Solarpunk imagines a world in which today’s existential threat - the climate crisis - is being approached with camaraderie and adaptive ingenuity.
Basic Rules:
- be constructive: there is no need of another internet space full of competition, negativity, rage etc.;
- no bigotry, including racism, sexism, ableism, transphobia, homophobia or xenophobia;
- be empathic: empathy is more rebellious than a middle finger;
- no porn and no gore: let’s keep this place easy to manage;
- no ads / spamming / flooding, we don’t want to buy/consume your commodified ideas;
- occasional self-promotion by active members is fine.
For any community related question or to just test some function: !meta@slrpnk.net
Try our Photon & Alexandrite frontends.
Or try our lightweight UI and Voyager mobile UI.
All accounts also work with XMPP chat automatically incl. our Movim client.
If you need to jointly brainstorm on your next Solarpunk text, try our Etherpad.
And don’t miss our Wiki.